Modeling Myself In Maya

For this assignment i was tasked with creating a model of myself in Maya. I started by taking reference images of myself and modifying a standard model in Maya.

bodymodel

After I had modeled myself to relative proportion i started modeling my head but struggled to get a good edge flow and a good level on detail. I decided to remodel the head from scratch via the use of you tube videos and i am happy with the result so far.

head-old-and-new

Character Creation

For my roller coaster scene I was required to create a character with a skeleton and morphing facial features. This character is meant to be a second passenger in the carriage with the viewer. But for mine I thought it would be more effective if I have my character on the outside of my fish tank looking in and tapping on the glass. The textures of the character are a simple change of colour within the hypershade. I used blend shapes to morph the face into different expressions.

Creating A Goldfish

In my roller coasters journey around the track I wanted there to be a fish that the diver passes and follows around. I took some reference images of the internet for a face on and side on view of a gold fish that I could model from. I created it with a cartoon style and started from a flat plane and extruded and manipulated vertices to I have the shape of the fish I wanted. To texture and paint the fish I imported the fish model from Maya over to Mudbox. I upped the models subdivisions from level 1 to level 5 and then added texture to the model as well as mold some eyes onto the model. From there I painted the model to the colours I wanted. I then exported the models normal map, ambient occlusion map and colour map from the level 5 model to apply back onto the level 1 model.


FishModelTransition

For the fish I wanted to give it some basic movement so rigged a skeleton and made the fish move via the use of expressions. I used a SIN formula to make two of the fish’s joints move from side to side

FishTailExpressions

Diver Carriage and Expressions

One main decision I decided the change was that the diver carriage would suspended below the track instead of sitting on top so the passenger could look down when near the top of the tank. There is an image below of the Diver and the track to give reference to my explanation.

DiverandTrack

The diver as well as most of the assets in the final scene where created in their own scene to then be imported into the final scene. All the Textures for the Diver where created using UV maps. The glass on the diver is just a plain blinn texture with transparency and a light blue tint.

I used expressions on the wheels and rear propeller to show the diver is rolling along the track instead of sliding. The speeds of these wheels are based on the U value of the diver’s motion path that goes around the track. This is so when the diver speeds up or slows down that the wheels rotation speed with do the same.

Expressions

Roller Coaster, New Theme, and Assets

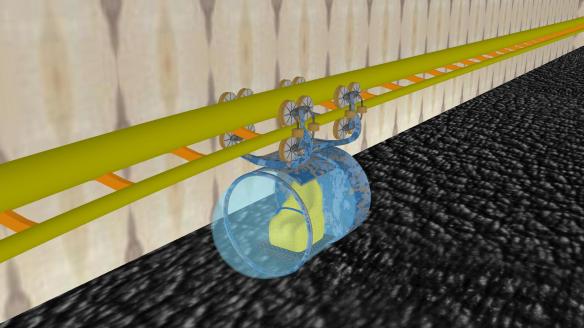
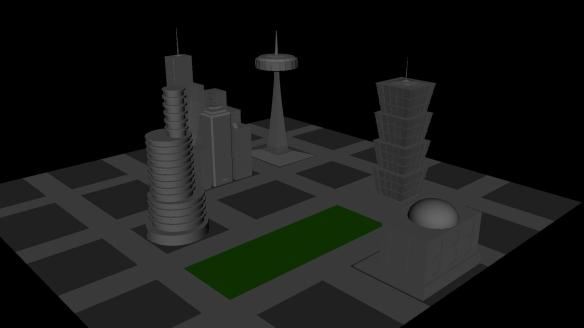
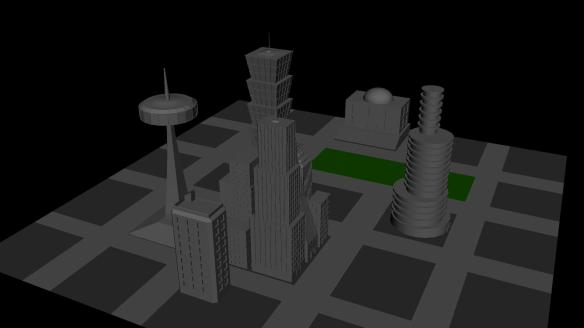
When I moved on from my original idea of the justice league. I realised that I needed to choose an environment that would be close together and dense as to give the illusion that the view is passing a lot of different objects when there are actually passing the same object from different angles. With this in mind I decided to go with the idea of a fish tank, where the passenger would ride around in a diver instead of a carriage. This also gives me a refined area to build a roller coaster in.

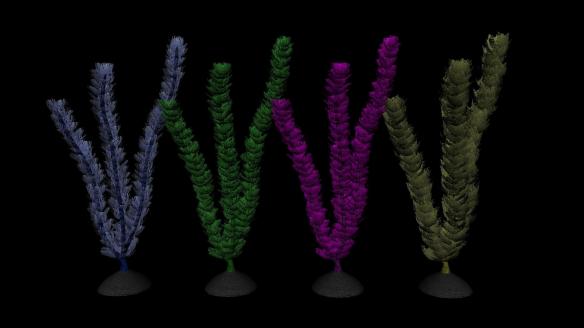
Some of the first things I made for the fish tank was some fake plants and coral. The fake sea plants where created using a basic stem shape and then duplicating the leaves all the way of the plant. There are 4 different kinds of plants I have created, all in different colours. Each colour plant is identically the same as far as shape and size are concerned but each one has been textured differently and rotated so each one looks different.

FishTankPlantAll

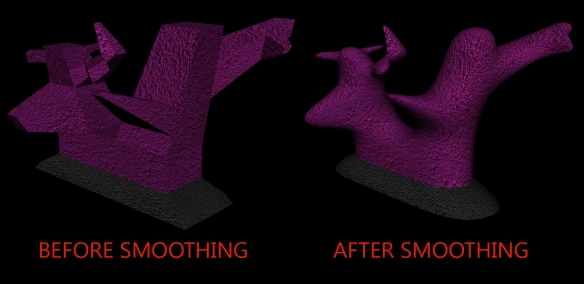
There are 3 different pieces of coral in the fish tank each a different colour. Each on was created from a simple cuboid and different faces extruded out. To finish it off I smoothed each one of them off to make each one look like coral. Although each coral was a different shape and size I used the same texture on each on and just changed the colour in Photoshop to keep the texture consistency the same.

Coral Bump Map

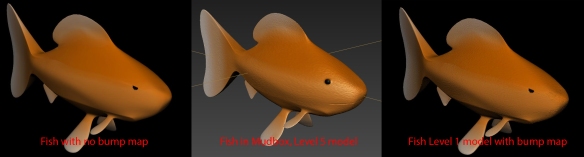
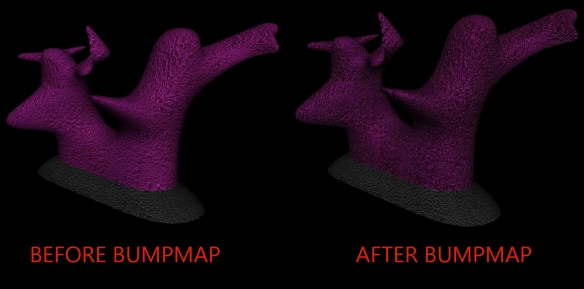
I also used a bump map on each of these to give a sense of depth within the object itself. Also because I used the same texture for each piece of coral I was able to use the same bump map for each one.

Coral Bump Map1

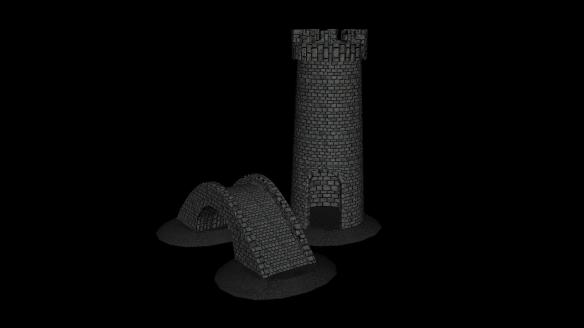
The only other objects I included in the scene was a bridge and castle just to give it that fish tank feel. I made these out of simple shapes and textured those using UV maps. These objects also have bump maps applied to them

Because I have used smoothing in a lot of my objects the UV textures have been stretched to accommodate this but these stretch marks are not noticeable when riding past objects at high speeds.

BridgeAndCastle

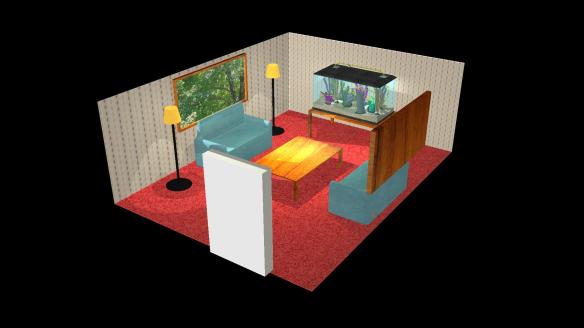
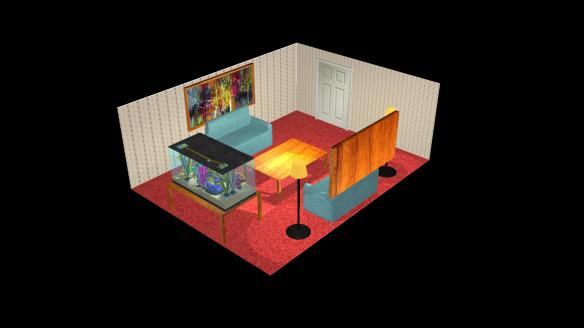
Although my roller coaster is within a fish tank I still needed to create some environment on the outside of the tank. I created a simple room with some basic object just as lamps, sofas, a window ect.

FinalFishTankScene 1.jpg

FinalFishTankScene 2


My Original Roller Coaster Theme

For My second assignment in my modeling module I was to create a roller coaster scene where the final render would take the view on a ride around the track. We also needed to have a unique theme that there view would experience and that we could also reflect in the way the roller coaster was built.

My first idea was for my theme to be based around the justice league and the main 7 super heroes that make up the league. The idea was to have a city environment and for the characteristics of the track to change relating to the super hero as the ride went on. As I started to make the city and the assets I would use for my scene i came to realize that  the idea I had in my head was just far to big for me to fulfill in the time frame given. Although I liked, the idea the more objects I built the less I was enjoying the idea and decided to think of new ideas. Below is the scene I made before changing my idea.

OriginalIdea1

building

Starting my roller coaster

For our big assignment coming up we are to create a themed roller coaster where the track and the surroundings are to be of a set theme. In anticipation for creating the track for a large scene, I created a small text track with changing speeds, hills and dips and banked curves. This is the final outcome of test track.

Modeling Lego In Maya & Lego Character

For this task we was asked to take one of the Lego 3 in 1 kits and make the models within Maya. The Lego models are based on Lego set 31001. I Modeled each Lego piece in the set in Maya all in one scene. Each model is made with the exact dimensions given by Lego. Some of the rounded pieces and pieces that are a special shape, where eye balled on some of the measurements using the physical version of the Lego set. Using precise measurements for each piece proved to be worth the time and effort as when is came to assembling each of the 3 models in Maya it proved quick and easy without any issues. Although I have gone into exact measurements I didn’t go into detail of the under side of each piece. The under side of each piece is just hollowed out to allow for little collisions when making the models. The material used on each piece was blinn with just a flat colour. This was to mimic the shiny plastic look that Lego has. If I was to do this again i would look into spending some more time with the detail of the under side of each piece and also trying to get the Lego logo on each of the nibs on each piece.(Probably using a bump map to keep the poly count low). Bellow are some single frame renders of the pieces and each of the models, followed by a short animation of each of the models. In the Animation you can see that i have used an envelope to manipulate the properties of some of the materials to make them glow mid animation, turning point lights on and off to simulate blinking lights, as well as some basic particle effects.

Lego Models1LegoPlane000

LegoShuttle000

LegoDrone000

Running along side the models of the different planes we were also asked to take a Lego figure and apply our own UV maps to create our own character. I use the Lego model given to us and decided I would base my model on Walter White from the TV series Breaking Bad.

LegoMan

|IMPROVEMENTS!|

So after a few weeks of focusing on other projects i decided to return to some of my older work and do some minor improvements before final marking.

with the lego models i decided to change the way the lights are animated turning on and off. Before I used key frames to set the light intensity up and down. where as now i have used expressions to change the lights intensity. Here is the expression I used as well as a short video showing the light expression.

FlashingLightExpressions 

I also decided to add a skeleton to my lego character as well as an accessory to include in a short animation.

Model of the Solar System

One of the first assignments of the new year at university was to make a model of the solar system. I went through different steps and trial an error ti decide what the best size would be for all the planets and the scale of distance. After a while it quickly became obvious that the scale of distance was going to be an issue as Neptune would have been so far out in the animation that that you wouldn’t have been able to see it. Bellow is a rendered image of the solar system where all the planets are to scale of each other (the sun is 2.5x smaller then it should be) and distance between each planet is to scale (the distance from the sun is not to scale). It is apparent that the 4 planets closest to the sun are too close together for the model to look visually appealing. Also there are no moons around any of the planets and the moons would be colliding with other planets. Because of this I decided to not scale distance with this solar system.

Solar System.1

From there I needed to choose a planet and have it do one complete rotation of around the sun with all the other planets rotating around the sun there respected amount of times. I decided to use Saturn. This is so the outer planets look like they are moving, at the same time that the planets closest to the sun wont be going too fast for the viewer to see.

I had to create a spread sheet with all my workings for planet size and distance. This consists of all the relevant information for the planets and moons i will be creating. It seems complicated but by using this i was able to calculate all the figures i needed to key frame to correct rotation after 1800 frames in a 30 FPS video.

Solar system infomation

With all of this i managed to produce a final outcome that i am fairly happy with. I manipulated the mash on the sun too look like it is moving in time and the earth and mars have an atmospheric glow. Here is a video of my final product.


|IMPROVEMENTS!|

After coming back after a few weeks focusing on other work I decided to change how my sun was textured. Before my sun was animated by warping the mesh of the sun so make it look like the texture was moving. Instead I added a fractal texture to the ambient light field of the sun texture. I key framed the rotational twist of the fractal layer and the texture is self but in opposite directions. This allows for the sun to stay in one uniform state and overall give a better affect then i originally conceived.

Starting To Use the Unreal Engine 4

Over the last couple of days I have started to experiment with UE4. I’ve had a fairly busy summer but I have started to dive back into design and programming after having a few weeks break. I am far to egar to wait for the university year to start again so I have started to learn UE4 with anticipation for the years to come. I started with the basics and used the video tutorials provided by Epic Games via YouTube. I briefly touched on the Unreal Blue Print system but my next step is to learn how to use the UE4 Blue Print system.