To end of the first semester of this year I had to complete a time constrained workshop. This is where you go in to uni in the morning, pick one of 3 briefs and then complete the brief of your choice to the best of your ability within 8 hours. The brief I decided to go for was a destruction derby environment as I believed these where my stronger points in modeling and also lets me showcase a lot of different techniques. After 8 hours I had completed the brief with what I consider a half decent outcome with the time given. I was able to show my use of motion paths as well as bending tilting and modifying the object associated with that motion path in the ways that I wanted. I also used expressions for the wheels, Blend shapes for deforming the cars and bump maps on the ground texture. Here is a final render from what I had achieved. The rendering was not part of the assessment and was rendered after the workshop was done.
Tag Archives: university
Creating a Game In Android Studio
For our second assignment I was to create an adventure game within android studio. The game itself could be all text based and only required simple buttons for movement from one room to the next. For me this seemed to simple and very similar to the text adventure I created last year in C++ (view post here). The purpose of this assignment is to show would could create the same program in different languages. I wanted to push myself and advance forward with my adventure game so I decided to stay within the boundaries of the assignment while at the same time creating some more advanced features. The main thing I wanted to do within the game is to get the player some movement so that the user could move the player around the screen. I managed to achieve this by using runnable functions for moving the player around and I also created a player controller to allow the user to move the player where they wanted. This was a lot harder then i first thought as android studio is not a game engine so the player controllers are a lot more finicky to created then in actual game engines. This also proved difficult when I wanted to test for collisions within the game as there is no On Collide function within android studio. To mimic an On collide function I used the rect function. This is more commonly used for drawing shapes on the screen. I used it to test for if one rect would intersect with another. Once I had programmed this it then allows the user to pick up and drop items where they please. For the final outcome of my game I was able to create an interactive game where the user has a lot more control then they would if there were to just hop from room to room with the press of a button. Essentially I was able to turn a 1 dimensional game into a 2 dimensional game. Here are some screen shots and a short video of me explaining my program in a little more detail.
First Programs In Android and Java
Come the start of a new year came the start of a new programming language. So with the introduction to this semester we started to learn Java from within Android Studio. We started out with some basic lessons and programs but before long we jumped right into the assessment programs. For me this was quite easy as moving from C++ to Java was a bit bumpy at first, became a very smooth learning curve.
Subnet Calculator
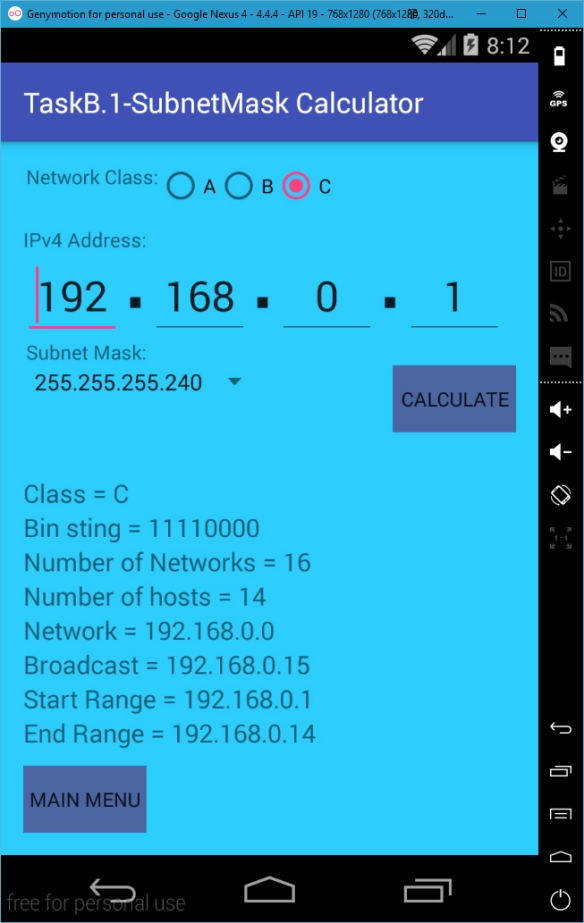
For our first assignment I was to create two separate programs. This fist of which was a sub net mask calculator where the user enters a IPv4 address and selects there sub net mask, and the outcome would show the user an array of useful information relating to the information given. The calculator only calculates fields for class A,B and C addresses. If a class D or E address is entered the program will recognize the type of address but not any of the other fields. This is because Class D and E are Multicast and Experimental classes and would require more information to obtain accurate outcomes.
Movie Database
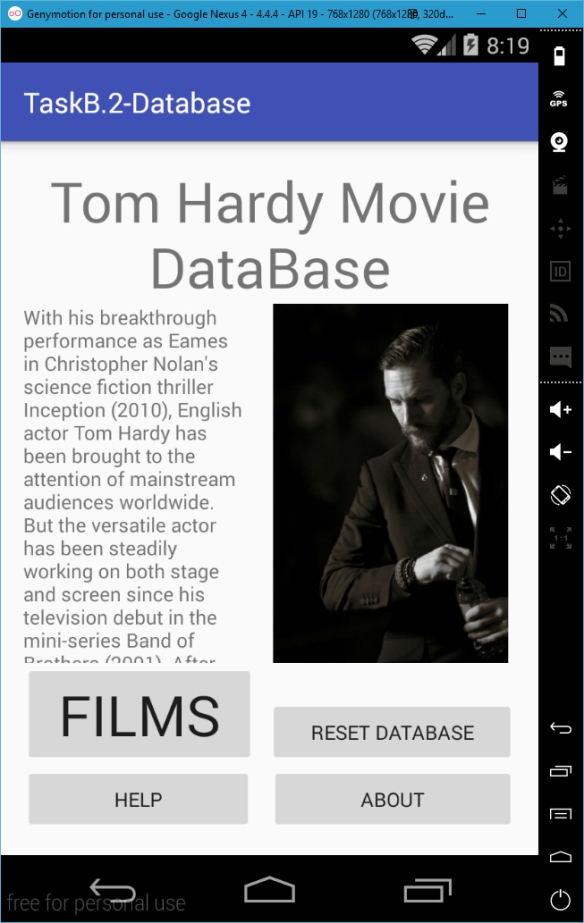
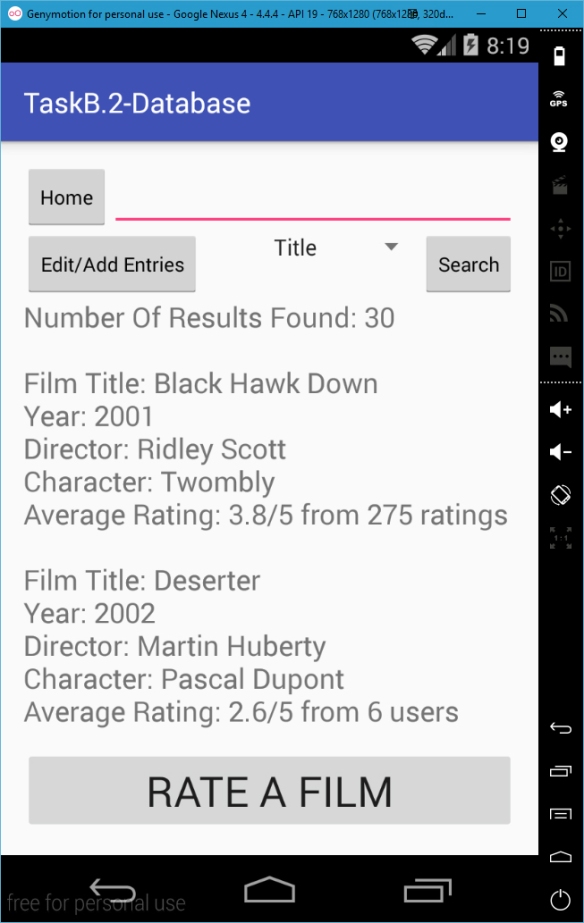
For the second task I was required to create a Movie database profile for on of my favorite actors. The main purpose for this was to implement an externally created database into the program. There was extra marks of offer for being able to actively edit the database from within the program giving the user freedom of editing the actors film information.
Brief Video Explanation
I have created a small video explain further how I created these programs and what i have been able to do.
Roller Coaster – Final Render
So after a few weeks of powering through I have managed to achieve a finished product. The entire video is only 1 minute long but I am very proud of what I have achieved. I used many techniques and software through out the possess of making this animation, all of which is explained in more detail in my previous posts.
Bellow is also a fill dome render for my scene although the output you will see is rectangular and fish eyed. The video input into the dome will be square and the final outcome will be a full 360 view of the enviroment.
Character Creation
For my roller coaster scene I was required to create a character with a skeleton and morphing facial features. This character is meant to be a second passenger in the carriage with the viewer. But for mine I thought it would be more effective if I have my character on the outside of my fish tank looking in and tapping on the glass. The textures of the character are a simple change of colour within the hypershade. I used blend shapes to morph the face into different expressions.
Creating A Goldfish
In my roller coasters journey around the track I wanted there to be a fish that the diver passes and follows around. I took some reference images of the internet for a face on and side on view of a gold fish that I could model from. I created it with a cartoon style and started from a flat plane and extruded and manipulated vertices to I have the shape of the fish I wanted. To texture and paint the fish I imported the fish model from Maya over to Mudbox. I upped the models subdivisions from level 1 to level 5 and then added texture to the model as well as mold some eyes onto the model. From there I painted the model to the colours I wanted. I then exported the models normal map, ambient occlusion map and colour map from the level 5 model to apply back onto the level 1 model.

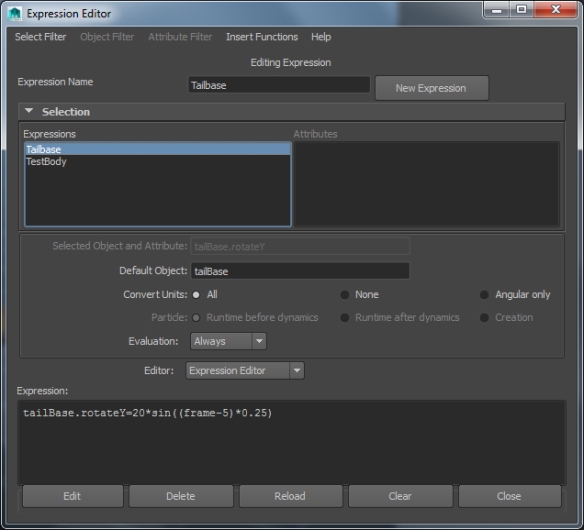
For the fish I wanted to give it some basic movement so rigged a skeleton and made the fish move via the use of expressions. I used a SIN formula to make two of the fish’s joints move from side to side
Diver Carriage and Expressions
One main decision I decided the change was that the diver carriage would suspended below the track instead of sitting on top so the passenger could look down when near the top of the tank. There is an image below of the Diver and the track to give reference to my explanation.
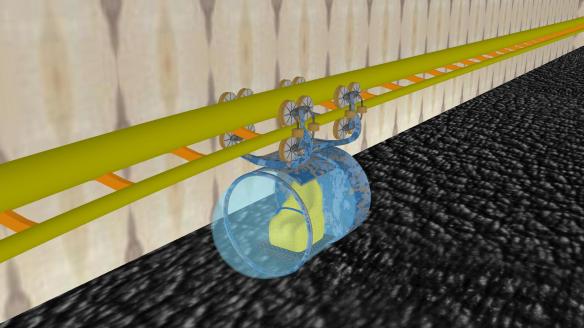
The diver as well as most of the assets in the final scene where created in their own scene to then be imported into the final scene. All the Textures for the Diver where created using UV maps. The glass on the diver is just a plain blinn texture with transparency and a light blue tint.
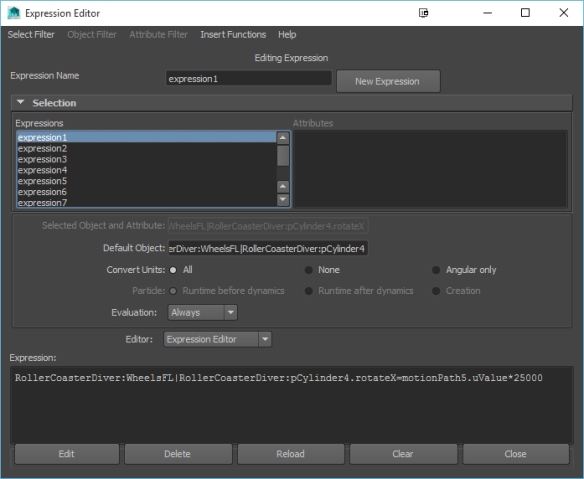
I used expressions on the wheels and rear propeller to show the diver is rolling along the track instead of sliding. The speeds of these wheels are based on the U value of the diver’s motion path that goes around the track. This is so when the diver speeds up or slows down that the wheels rotation speed with do the same.
Roller Coaster, New Theme, and Assets
When I moved on from my original idea of the justice league. I realised that I needed to choose an environment that would be close together and dense as to give the illusion that the view is passing a lot of different objects when there are actually passing the same object from different angles. With this in mind I decided to go with the idea of a fish tank, where the passenger would ride around in a diver instead of a carriage. This also gives me a refined area to build a roller coaster in.
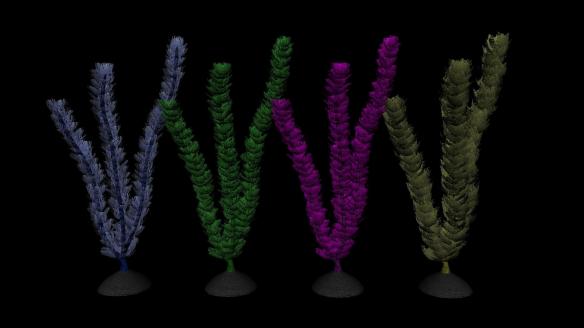
Some of the first things I made for the fish tank was some fake plants and coral. The fake sea plants where created using a basic stem shape and then duplicating the leaves all the way of the plant. There are 4 different kinds of plants I have created, all in different colours. Each colour plant is identically the same as far as shape and size are concerned but each one has been textured differently and rotated so each one looks different.
There are 3 different pieces of coral in the fish tank each a different colour. Each on was created from a simple cuboid and different faces extruded out. To finish it off I smoothed each one of them off to make each one look like coral. Although each coral was a different shape and size I used the same texture on each on and just changed the colour in Photoshop to keep the texture consistency the same.
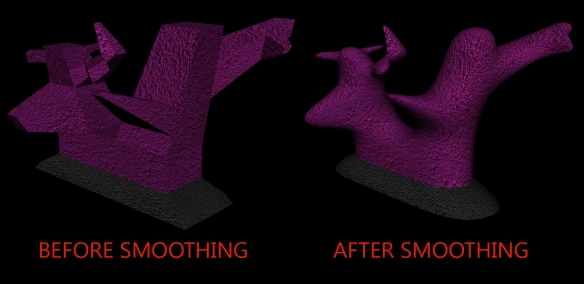
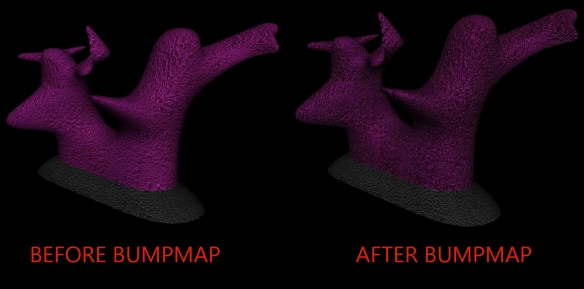
I also used a bump map on each of these to give a sense of depth within the object itself. Also because I used the same texture for each piece of coral I was able to use the same bump map for each one.
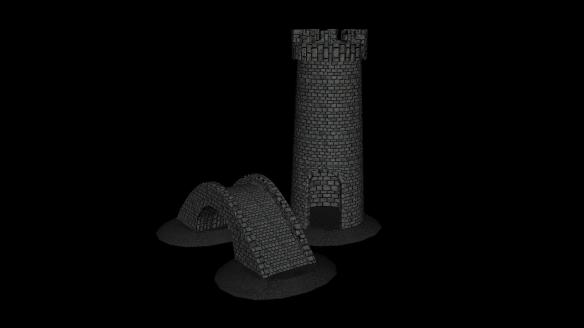
The only other objects I included in the scene was a bridge and castle just to give it that fish tank feel. I made these out of simple shapes and textured those using UV maps. These objects also have bump maps applied to them
Because I have used smoothing in a lot of my objects the UV textures have been stretched to accommodate this but these stretch marks are not noticeable when riding past objects at high speeds.
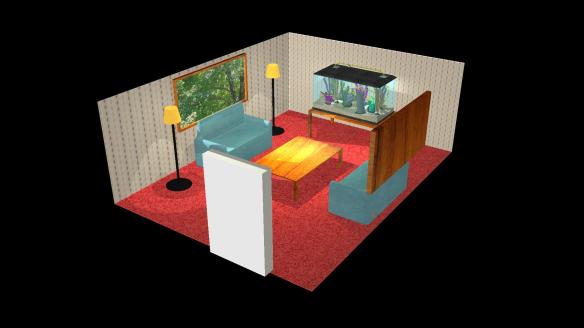
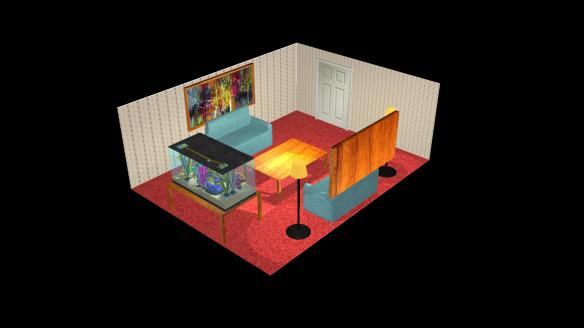
Although my roller coaster is within a fish tank I still needed to create some environment on the outside of the tank. I created a simple room with some basic object just as lamps, sofas, a window ect.
My Original Roller Coaster Theme
For My second assignment in my modeling module I was to create a roller coaster scene where the final render would take the view on a ride around the track. We also needed to have a unique theme that there view would experience and that we could also reflect in the way the roller coaster was built.
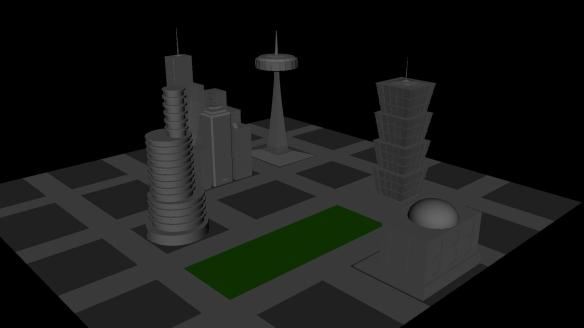
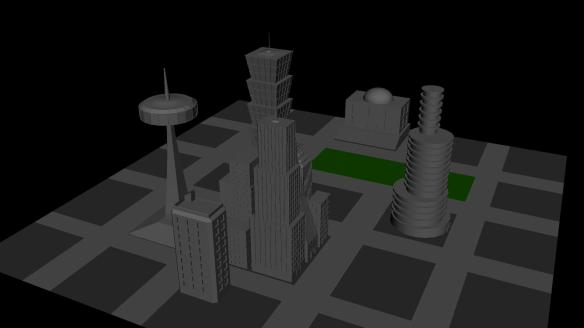
My first idea was for my theme to be based around the justice league and the main 7 super heroes that make up the league. The idea was to have a city environment and for the characteristics of the track to change relating to the super hero as the ride went on. As I started to make the city and the assets I would use for my scene i came to realize that the idea I had in my head was just far to big for me to fulfill in the time frame given. Although I liked, the idea the more objects I built the less I was enjoying the idea and decided to think of new ideas. Below is the scene I made before changing my idea.
Modeling Lego In Maya & Lego Character
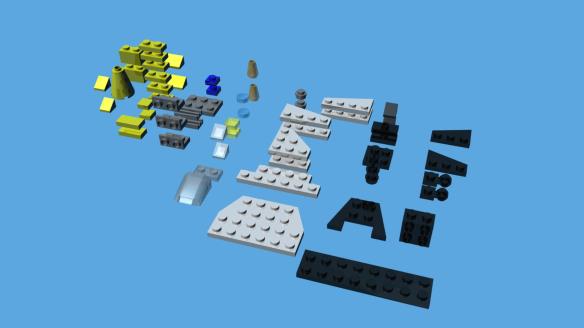
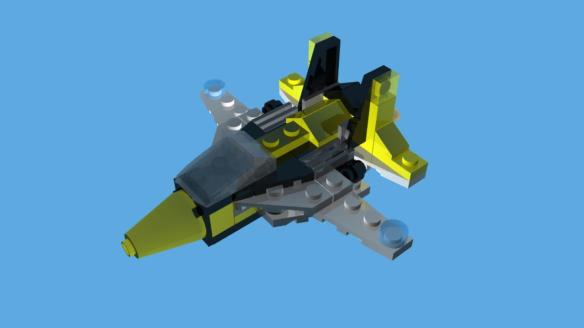
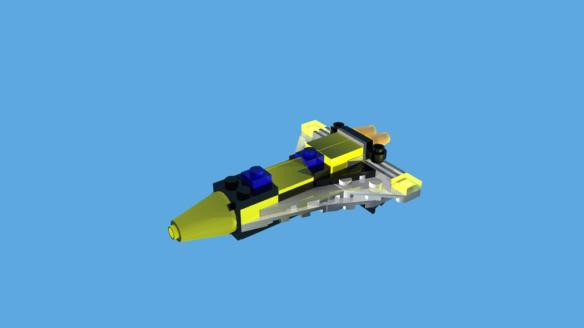
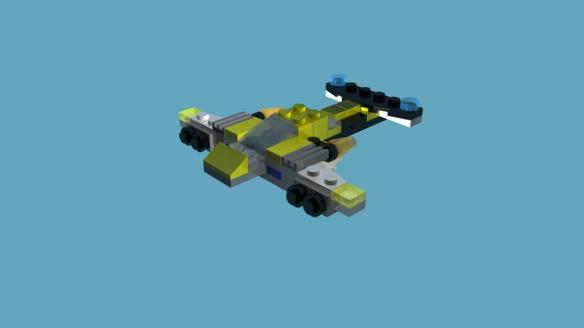
For this task we was asked to take one of the Lego 3 in 1 kits and make the models within Maya. The Lego models are based on Lego set 31001. I Modeled each Lego piece in the set in Maya all in one scene. Each model is made with the exact dimensions given by Lego. Some of the rounded pieces and pieces that are a special shape, where eye balled on some of the measurements using the physical version of the Lego set. Using precise measurements for each piece proved to be worth the time and effort as when is came to assembling each of the 3 models in Maya it proved quick and easy without any issues. Although I have gone into exact measurements I didn’t go into detail of the under side of each piece. The under side of each piece is just hollowed out to allow for little collisions when making the models. The material used on each piece was blinn with just a flat colour. This was to mimic the shiny plastic look that Lego has. If I was to do this again i would look into spending some more time with the detail of the under side of each piece and also trying to get the Lego logo on each of the nibs on each piece.(Probably using a bump map to keep the poly count low). Bellow are some single frame renders of the pieces and each of the models, followed by a short animation of each of the models. In the Animation you can see that i have used an envelope to manipulate the properties of some of the materials to make them glow mid animation, turning point lights on and off to simulate blinking lights, as well as some basic particle effects.
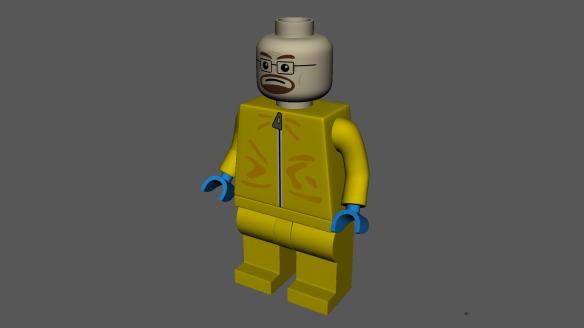
Running along side the models of the different planes we were also asked to take a Lego figure and apply our own UV maps to create our own character. I use the Lego model given to us and decided I would base my model on Walter White from the TV series Breaking Bad.
|IMPROVEMENTS!|
So after a few weeks of focusing on other projects i decided to return to some of my older work and do some minor improvements before final marking.
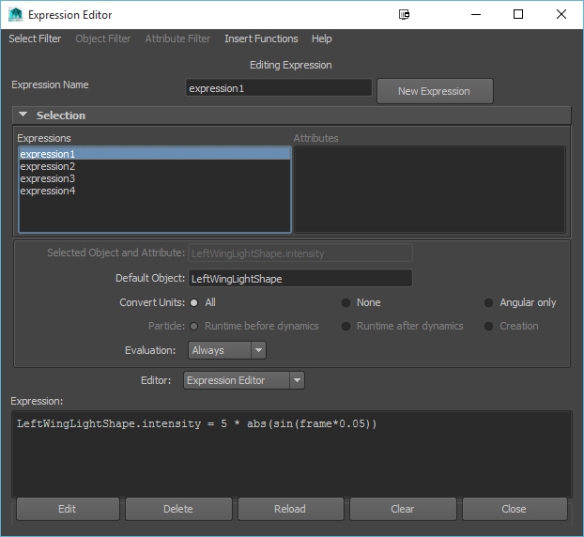
with the lego models i decided to change the way the lights are animated turning on and off. Before I used key frames to set the light intensity up and down. where as now i have used expressions to change the lights intensity. Here is the expression I used as well as a short video showing the light expression.
I also decided to add a skeleton to my lego character as well as an accessory to include in a short animation.


